
Connect Claude over MCP
IronShard runs a production MCP server at https://mcp.ironshard.ai/mcp. Add it to Claude as a custom connector, and Claude can list your buckets, read and upload objects, and create buckets, within the access you grant it. Claude signs in with OAuth. You never copy a key into Claude, and you choose what it can reach on a consent screen and can change it in the console at any time.
This page walks through the setup in Claude Desktop, from an empty Agent Connections list to a working test prompt.
What You Need
- An IronShard account. Sign up in the console. Activate it from the email you receive, then sign in.
- Claude Desktop, signed in to the Claude account that will use the connector.
- A bucket (optional). Claude can see buckets that already exist. To test with some data, create one in the console under Buckets → New Bucket before you start.
Walkthrough
1. Open Agent Connections
In the console, open Access → Agent Connections. Every agent or application connected to your account over MCP is listed here, with its credential mode, status, and active grants. On a new account, the list is empty.
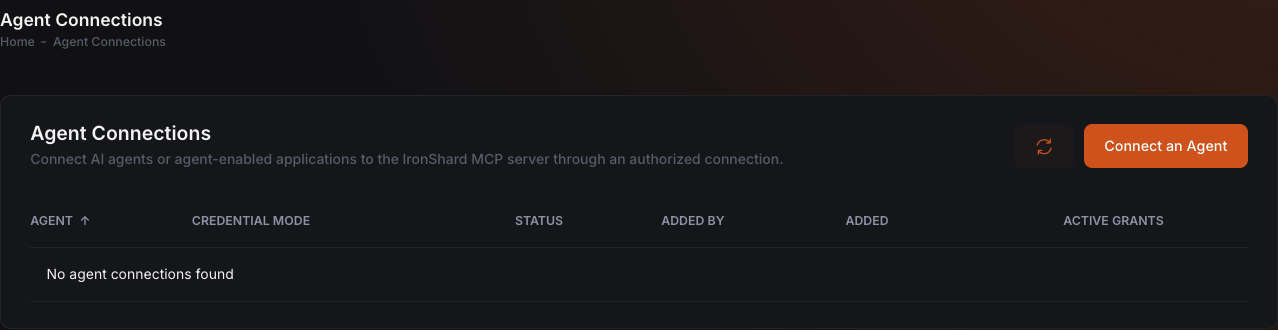
Select Connect an Agent.
2. Choose OAuth 2
The console offers three ways to connect:
- Claude Managed Agents: stores MCP credentials in a Claude Vault for use from a Managed Agent.
- OAuth 2 (recommended): for agents that ask a person to authorize them in a browser, or that run server-side with access defined at client registration. Claude Desktop is this kind of agent.
- Static Token: a bearer token in the
Authorizationheader, for agents that cannot perform OAuth.
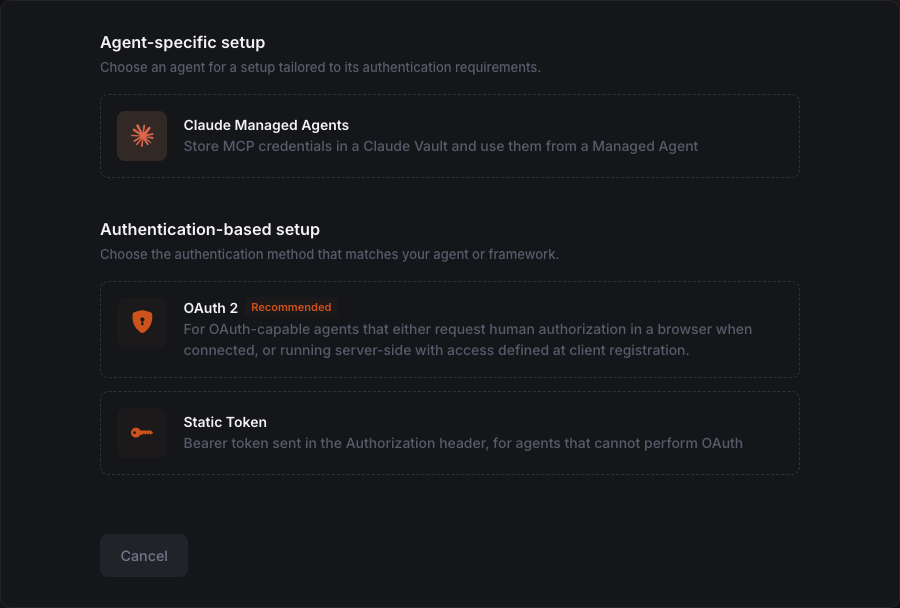
Choose OAuth 2. The console shows the MCP server URL. Copy it and select Done.
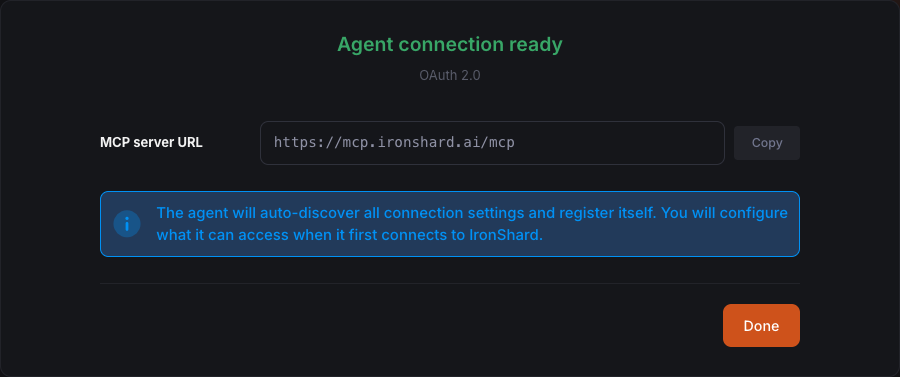
Nothing is registered yet. Claude discovers the connection settings and registers itself when it first connects, and that is when you decide what it can access.
3. Add a Custom Connector in Claude
In Claude Desktop, open Settings → Connectors, select Add, and choose to add a custom connector. Fill in the two fields:
- Name:
IronShard. This is the name shown in your connectors list. - MCP server URL:
https://mcp.ironshard.ai/mcp
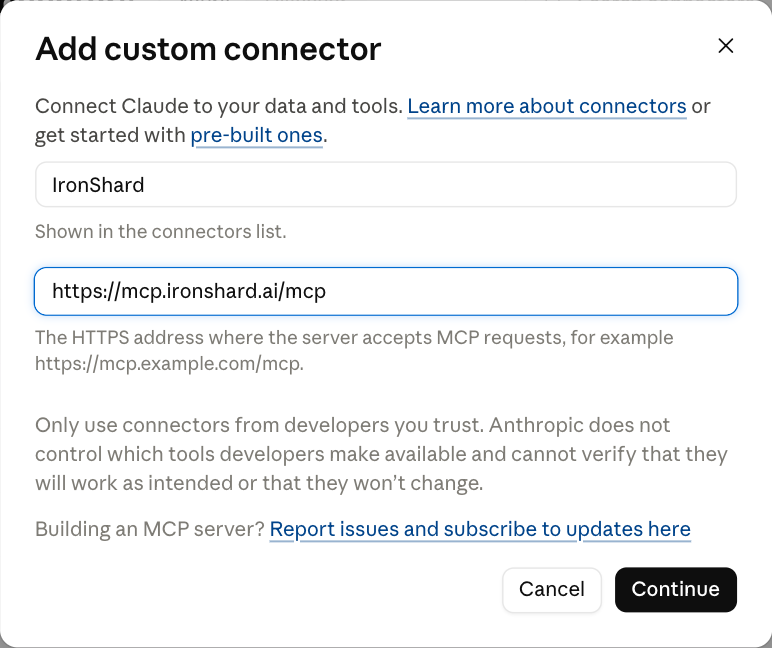
Select Continue.
4. Continue Past the Server Check
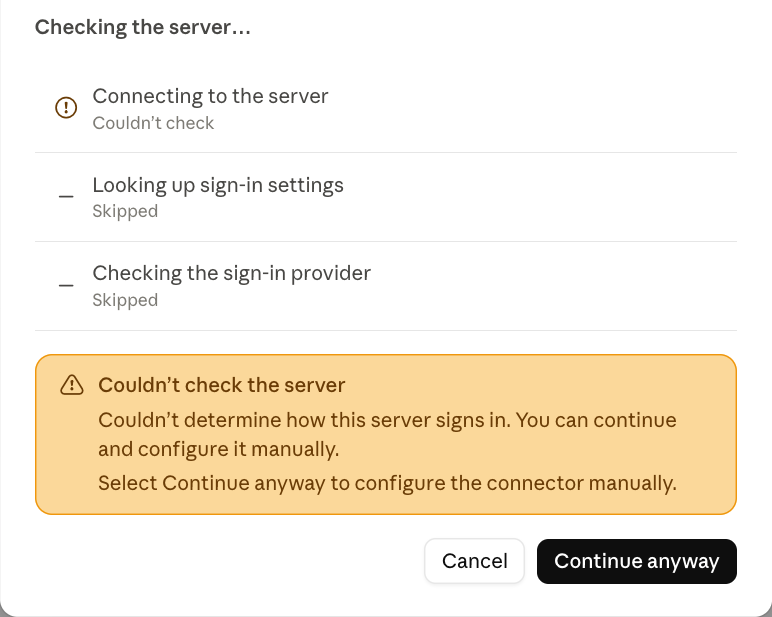
Claude may report that it couldn't check the server or determine how it signs in. This is expected. Select Continue anyway.
On the next screen, Claude detects the sign-in settings on its own. Keep the defaults:
- Authentication: Sign in now
- OAuth client: Use Claude's published identity
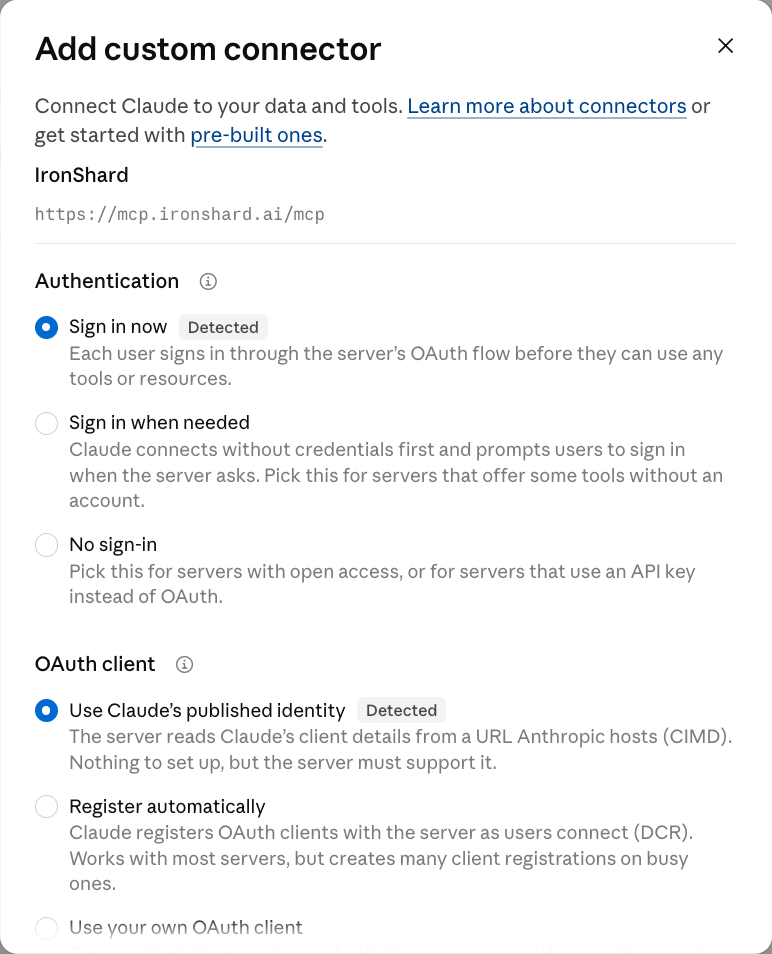
Save the connector. It now appears in your connectors list as not connected yet. Open it and select Connect.
5. Authorize Claude in IronShard
A browser tab opens on claude.ai and asks whether to finish connecting a connector. Select Continue connecting. You are sent to the IronShard console. Sign in if you are not already signed in.
The Authorize Claude screen sets Claude's initial access. Make a choice for each question:
- Which data can this agent access? No existing data, selected buckets, or all buckets.
- Where can it write? Nowhere, a new bucket, or anywhere it can read.
- How long should this access last? 1 hour, 24 hours, 7 days, or until revoked.
- Why is this access needed? An optional note, shown as the grant's purpose in the console.
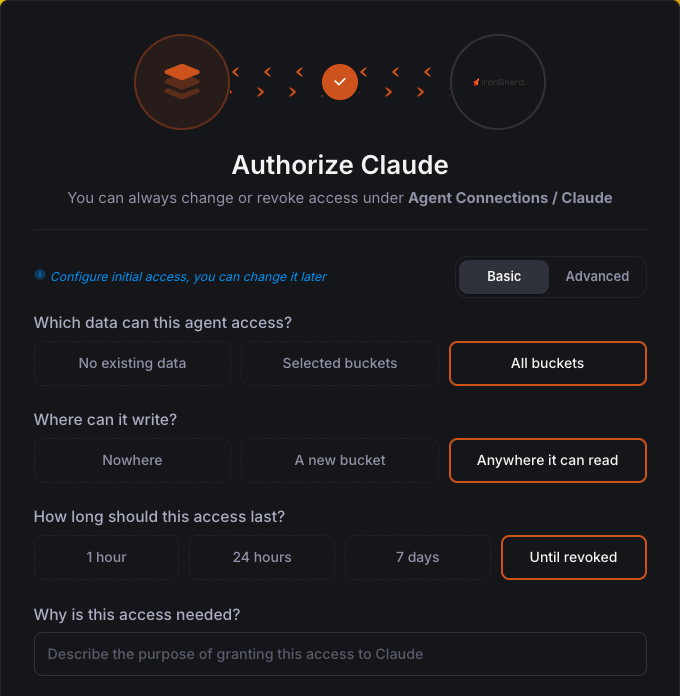
The Basic tab covers these questions, and an Advanced tab is also available. Check that the account shown under the options is the one you want to connect, then select Allow access.
Claude confirms the connection and offers to take you back to the desktop app. You can close the browser tab.
6. Review the Grant
Back in the console, Agent Connections now lists Claude as Authorized with Interactive OAuth. Open it and select the Grants tab to see exactly what you allowed: which buckets, read or write, whether Claude may create new buckets, and when the access expires.
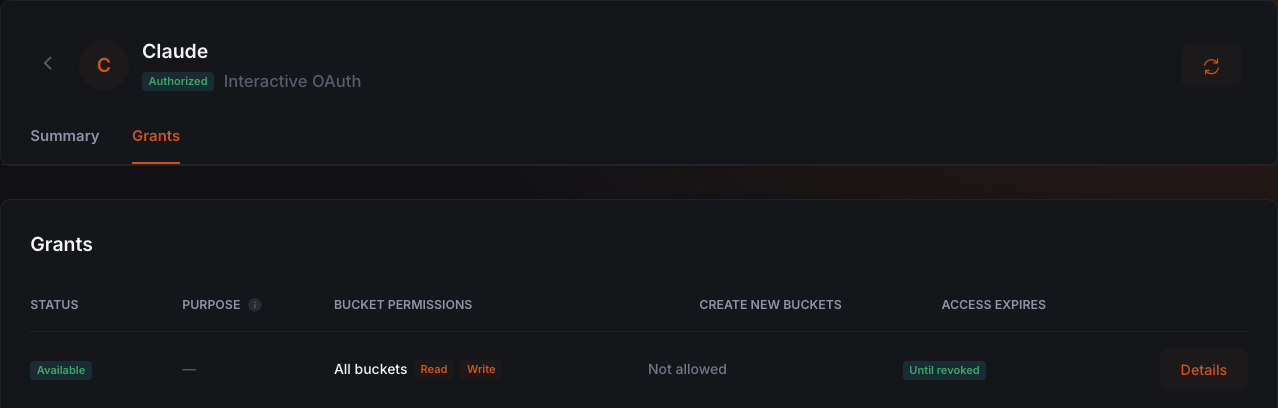
This is also where you change or revoke Claude's access later. You don't need to reconnect the connector in Claude to do it.
7. Turn the Connector On in a Chat
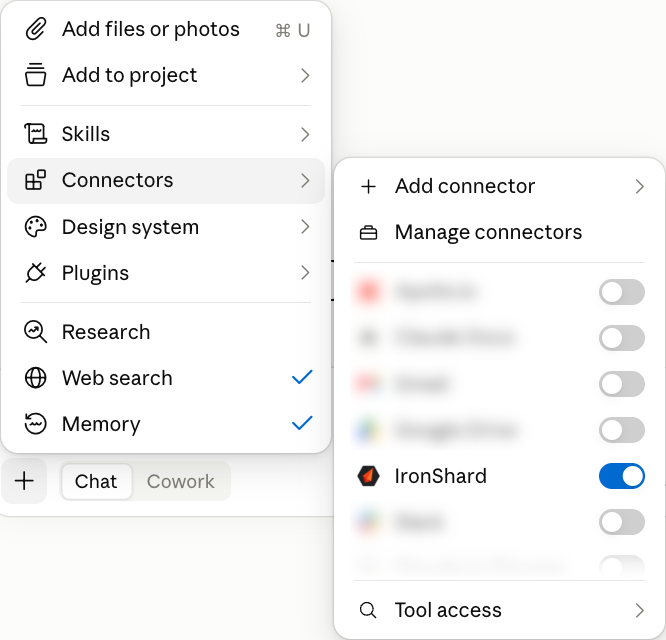
In a Claude chat, open the + menu, go to Connectors, and switch IronShard on.
8. Test the Connection
Ask Claude something only IronShard can answer:
I am testing the IronShard connector. Can you tell me which buckets you have available?
Claude uses the IronShard tools and reports what it can see, along with what its current credentials allow.
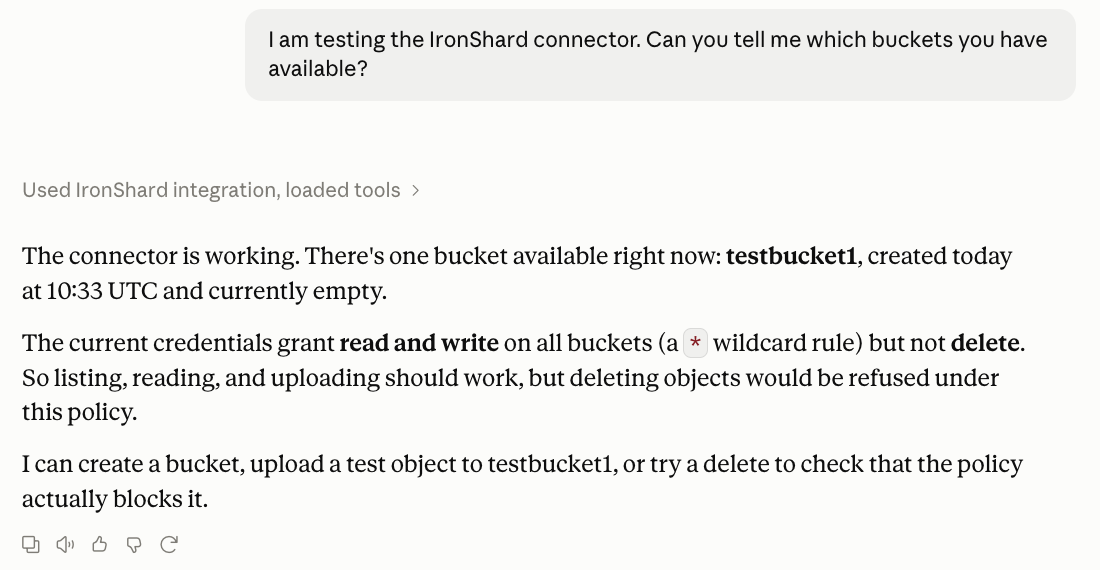
In this example, Claude sees one empty bucket and reports read and write on all buckets but no delete, which matches the grant from step 6. If Claude sees fewer buckets than you expect, check the grant before you check anything else.
Troubleshooting
- "Couldn't check the server" when adding the connector. Select Continue anyway. The sign-in settings are detected on the next screen.
- Claude doesn't use IronShard. Make sure the connector is switched on for the current chat (step 7), and mention IronShard in your prompt.
- A bucket is missing or a write is refused. Claude only sees what its grant allows. Open Agent Connections → Claude → Grants and check the buckets, permissions, and expiry.
- Access stopped working. Grants set to 1 hour, 24 hours, or 7 days expire. Check Access Expires on the Grants tab.
Next Steps
- Get Started with the S3 API: use the same buckets from the AWS CLI, boto3, or the JavaScript SDK.
- Agent Buckets: let an autonomous agent create and operate its own sandbox bucket, with no account.
- Erasure Coding and Distribution: how the objects Claude writes are erasure-coded and distributed across providers.